Tuesday, January 25, 2011

Gluten Free, Egg Free, Dairy Free Chocolate Brownies


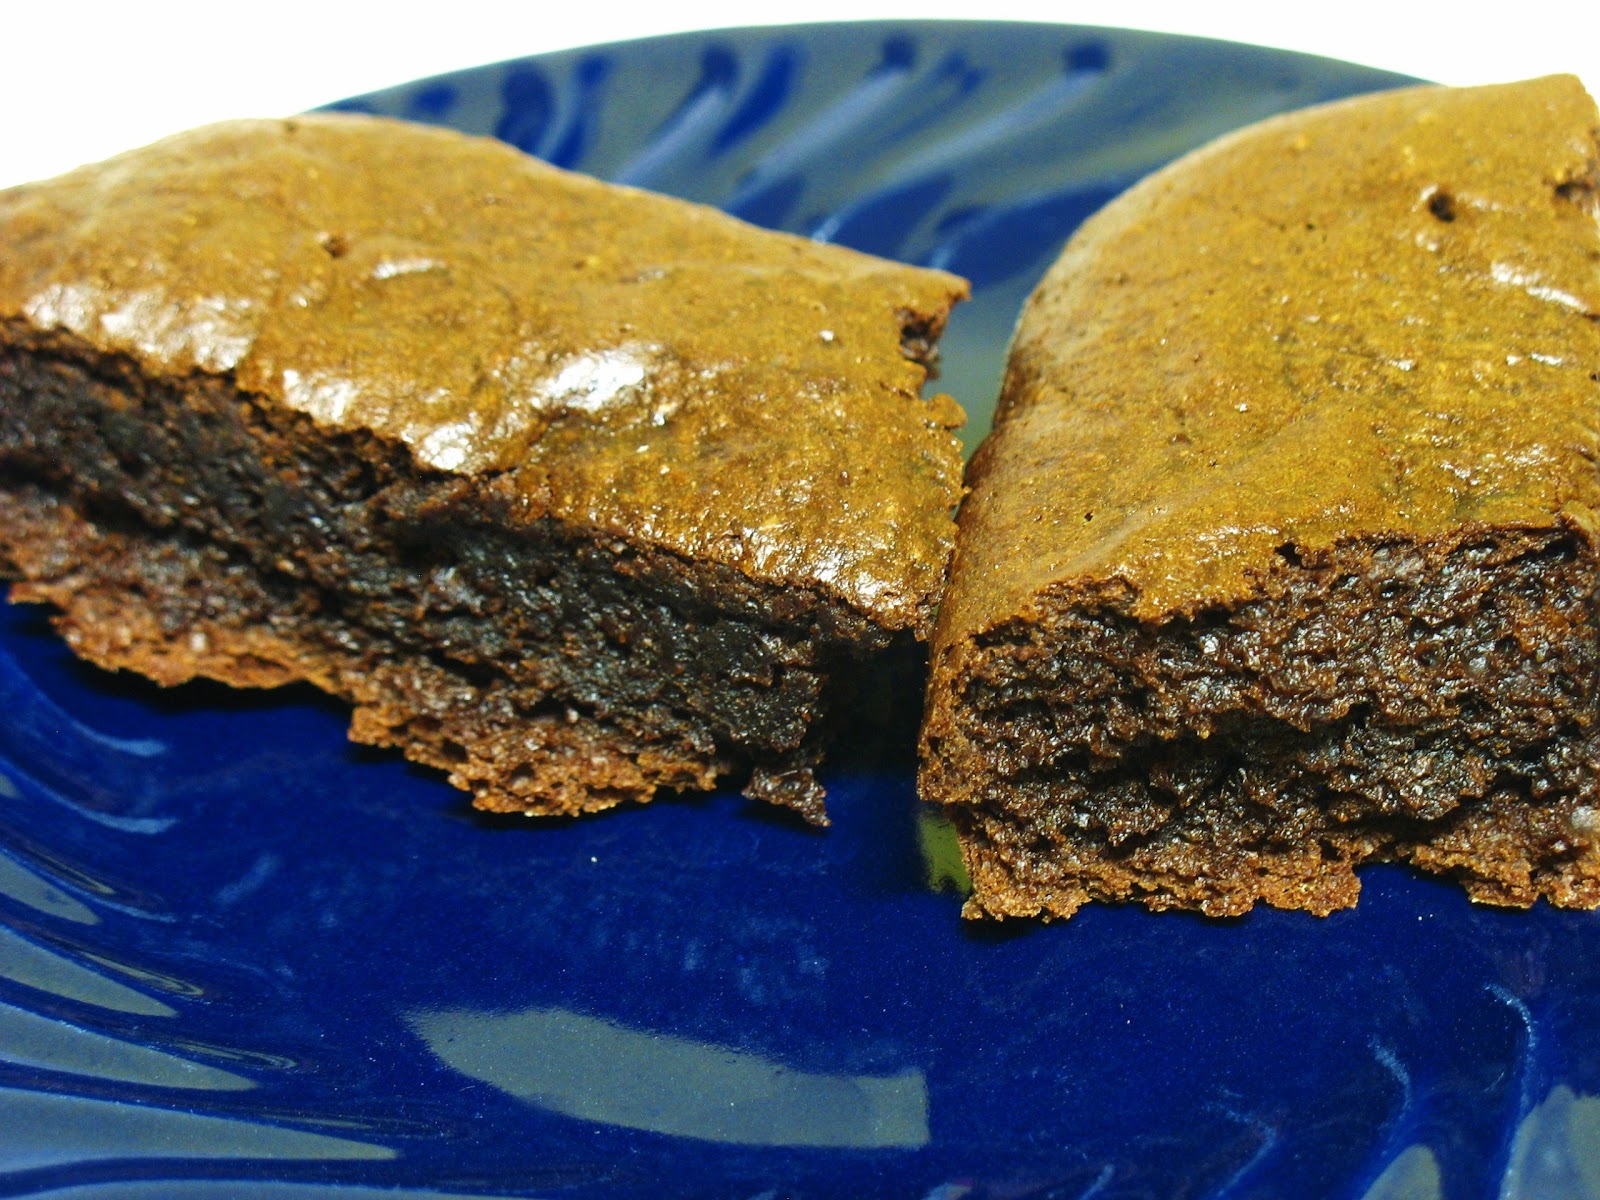
These really turned out delicious!  Even I was skeptical and I created the recipe.  So go ahead and doubt, but doubt and try them.  I was delighted with the results and so was Shawn.  These are so delicious you won't notice that they are actually kind of healthy for you.  The benefits of flaxseed meal are abundant.

I generally don't plan to make recipes free of anything but gluten because Shawn has Celiac Disease, but recently I've been trying some egg replacements and dairy replacements.  Partly for my own health and partly by reader requests.

If you or your gluten free loved ones do not need to replace eggs and milk in your diet, give these a try anyhow, I know you will enjoy them sans guilt.

Ingredients

1 cup Cocoa
3/4 cup Sweet Rice Flour
3/4 cup Tapioca Flour
1/2 cup Arrowroot
1/2 cup Gluten Free Oat Flour
2 cups Sugar
1 teaspoon Guar Gum
3 tablespoons Flaxseed Meal
9 tablespoons hot water
1 cup soymilk
1 tablespoon apple cider vinegar
1 teaspoon of pure vanilla extract (check for gluten free)
1 teaspoon baking soda
1 teaspoon baking powder
1 teaspoon salt
1/2 cup unsweetened applesauce
1/2 cup vegetable oil

Begin by mixing the 9 tablespoons of  hot water with the 3 tablespoons of flaxseed meal and set this aside to get "goopy".  This is your egg replacement.

Next mix the soymilk and the apple cider vinegar together and sit aside to come to room temperature.

Next mix all the flours, sugar, and cocoa together.

Now, in your stand mixer, mix together all the ingredients.  It will take awhile to do it without raising a cloud of cocoa smoke in your kitchen.  Watch it closely as the batter is sticky and will climb the beaters.  Towards the end of the mixing I usually have to tilt the mixer back just a little to keep the batter from climbing up the mixers and making a complete mess.

I split the batter evenly between 2 10x7 brownie pans that I had sprayed with crisco cooking spray then floured with sweet rice flour.

Bake in a preheated oven at 350 degrees for 30 minutes.  Test centers with a toothpick, if it comes back clean, they are done.

Remove from pans and cool on wire racks.

These were delicious, moist and chewy.  I definitely will make these quite often.  I bet they would be good with a gluten free fudge frosting too!

Enjoy!


Saturday, January 22, 2011

Gluten Free Chicken and Dumplings


This was so easy it seemed to make itself.  I am the biggest fan of my grandma's recipe for this, but it's not gluten free.  I didn't have anything to go on but the memory of watching Grandma make chicken and dumplings.  So i improvised what I thought would work and Tah Dah!

I like the texture of my dumplings to be somewhere between a dinner roll and a fat noodle.  These did not disappoint.  They were bread-like in the center and moist chewy noodle-like on the exterior.  The best part is, very little effort goes into making this recipe.

Ingredients

3 large chicken breasts
2 cups milk
Celery (a few stalks)
1 bag of carrots
1 teaspoon celery salt
1 teaspoon garlic salt
1 teaspoon sea salt
1 cup washed whole leaf spinach
1 medium sweet vidalia onion
1 bag of frozen peas
1 teaspoon ground black pepper
1/2 teaspoon ground sage
1/2 teaspoon dried basil
1/2 teaspoon ground marjoram

Dumplings

1/2 cup Tapioca Starch/Flour
1/2 cup Arrowroot
1/2 cup Potato Starch (not potato flour)
1/2 cup Sweet Rice Flour
2 teaspoons baking powder
1/4 teaspoon salt
1/2 teaspoon Guar Gum
3 eggs
1/4 cup milk


Begin by filling a stock pot with about 8 cups of water.  Put in the Chicken, the spices, 1/3 of the carrots (chopped), the celery, and the spinach.   Boil this until chicken is beginning to fall apart easily.  (I cooked it for several hours, but you can do less.)

Remove from heat.  Remove the chicken from the liquid and shred in a separate bowl.

Strain the remaining stock pot mixture through a strainer and into your dutch oven.  Throw away the solids (cooked vegetables). Add 2 cups of milk.

Add the frozen peas, dice and add the remaining carrots, dice and add the onion.  Add the shredded chicken.  Bring this to a boil.  Reduce heat and simmer while you prepare the dumplings.

Whisk all the dry ingredients together thoroughly in your stand mixer bowl.  Make a well in the center for the liquid and eggs.

With dough hooks attached, add the milk and the eggs and let it run.  The mixer most likely will not completely incorporate the ingredients into a dough ball.  Work it by hand at the end.  It's not very sticky at all.

Bring the dutch oven's contents back to a boil.  Pinch off portions of dough and roll in your palms into a ball.  I did mine about 1/2 inch in size.  Drop the balls into the boiling mixture.  They will begin swelling and float to the top.

Once all the dumplings are floating, I put the whole pan into the oven for about 30 minutes at 350 degrees to brown the top layer a little.

At this point it is done and edible.  It just wasn't quite thick enough of a sauce for me so I removed the dumplings, added 2 tablespoons of potato starch and 1 tablespoon of arrowroot.  Stirred this in until thickened and added back the dumplings.

Plate and Enjoy!


Friday, January 14, 2011

Gluten Free Red Velvet Cake


Red Velvet Cake.   We all love Red Velvet Cake, but why?  It's basically a chocolate cake with red food coloring.   Perhaps it's the frosting, cream cheese and butter with vanilla and powdered sugar.  There is just something about the deep red color of the cake in contrast to the stark white frosting that makes us all salivate just a little.


Whatever our fascination with this unique cake, I decided to make one gluten free.  The results were mouth watering.  A must try.  If you have any issue with red food coloring, leave it out and up the cocoa to 1/2 cup and enjoy a delicious chocolate cake.

Ingredients

3/4 cup Sweet Rice Flour
3/4 cup Tapioca Flour
1/2 cup Arrowroot 
1/2 cup Potato Starch (not potato flour)
1 teaspoon Guar Gum
1 teaspoon Xanthan Gum
1 teaspoon Baking Powder
1 teaspoon Baking Soda
1 teaspoon Salt
1 teaspoon pure vanilla extract
1 ounce red food coloring
2 tablespoons Cocoa (heaping)
1 stick of Unsalted Sweet Cream Butter (room temperature)
1 and 1/2 cups Sugar
1 cup Buttermilk
2 eggs

Begin by whisking the flours, gums, baking powder, soda, and salt together thoroughly in a bowl.  Take your time and blend together well.

Next, add the cocoa to the flour mixture.

Whisk the cocoa into the flour mixture thoroughly until it's barely a pastel brown.

Next, Cream the butter, sugar, vanilla, and eggs together in your stand mixer.

Next I added 1/3 of the buttermilk and all of the red food coloring, then mixed well.  A lot of recipes call for 2 ounces of red food coloring.  I used McCormick Red Food Coloring, it came in 1 ounce bottles and cost almost $4.00 and, as you can see, it was plenty red.  My decision is....  There is no need to put $8.00 worth of red food coloring (a synthetic ingredient) into this cake.  It doesn't change the flavor and half that, 1 fluid ounce, made it as red as any red velvet cake I have seen.

Next, add the flour mixture in 1/3 at a time and blend well between additions.  Add the buttermilk in between the thirds .  When all is thoroughly incorporated, it will be thick.

Baking time depends on the cake pan you use.  Be sure to butter and flour your pan choices.  I used my brownie pans because I wanted 4 even layers.  I divided the batter evenly between the four brownie pans and baked for 20 minutes at 350 degrees.  When done (test centers with a toothpick) turn pan over and cool upside down on wire racks.

While cooling let's prepare the frosting.

Frosting Ingredients

1 stick Unsalted Sweet Cream Butter at room temperature
1 package (8 ounce) Neufchatel Cheese at room temperature (cream cheese will do)
1 teaspoon pure vanilla extract
3 cups powdered sugar

In your stand mixer, cream together the softened cheese and butter.  Add the vanilla.  Add the powdered sugar 1/2 cup at a time.  Blending until smooth between each addition.

Now that the cake layers are cooled, we can begin frosting.  Place one cake layer and frost the top only with a thin layer of frosting.  Place a second layer and repeat.

Repeat with the remaining layers.  Once all 4 layers are stacked and frosted, begin applying frosting to the sides.  At this point use the remainder of the frosting and apply kind of thick to hide any of the red interior from showing through.

The better you cover the cake with the white frosting, the more dramatic the visuals when someone finally cuts into it.

All in all, this cake recipe was a huge success. (third times a charm)

Hint ~ This cake should be refrigerated if not eaten right away.  Refrigeration stiffens the cake texture slightly, but simply let it warm up a few minutes before eating and the texture returns to its pre-refrigerated state.

Enjoy!