I had heard of the Nightline episode #161 about gluten free diets being dangerous so I watched it online. If you watched it too, you were probably angered just like I was. The segment in question spoke of gluten free diets as a potentially dangerous "fad diet" that is very popular now.
Here is a link to the episode.
http://abcnews.go.com/watch/nightline/SH5584743/VD5595832/nightline-gluten-free-food
I found this "response" to that episode online also and thought I would share it here.
This is Dr. Vikki Petersen's thoughts on the use of the word "dangerous" in conjunction with a gluten free diet.
Dr Vikki Petersen is an author, a clinical nutritionist, and a leader in gluten sensitivity diagnosis, research, and treatment.

Tuesday, November 30, 2010
Gluten Free Fudge - Peanut Butter and Chocolate

Fudge is great anytime of year, but the Holidays is when we crave it the most.
When I was a young boy, every Thanksgiving and Christmas was celebrated with a huge dinner and get together at Grandmas house. There was always several Aunts that thought their fudge was supreme and they would make multiple batches of various kinds of fudge and vie for supremacy of the dessert table.
I grew up addicted to fudge. As the years went on and I got older, the trips back home for the Holiday get together at Grandmas grew less frequent for everyone and eventually stopped all together.
Only recently have I begun making fudge a part of Our Holidays again. You would think that fudge is always and naturally gluten free. It isn't. There are two ingredients that could contain gluten. You must read these labels thoroughly. The powdered sugar or confectioner's sugar can contain gluten but not always. The Pure Vanilla Extract can contain gluten if it is in a grain derived alcohol. For the pure vanilla extract, I use McCormick Pure Vanilla Extract. Their company has an awesome "gluten free" philosophy in labeling. Plus the alcohol used is not "grain derived".
Both, My Peanut butter Fudge and My Chocolate Fudge, are the exact same recipe except for the addition of 1 cup of cocoa to the chocolate fudge.
Ingredients
2 and 1/4 cups light brown sugar
1 stick of unsalted sweet cream butter (8 tablespoons)
2 cups of powdered sugar
1/2 cup whole milk
3/4 cups peanut butter
1 teaspoon pure vanilla extract
(only for chocolate fudge)
1 cup Cocoa
extra butter to grease containers with.
Before starting butter the containers that you are going to set-up the fudge in.
Now for the fudge. Begin by melting the butter in a large saucepan. Add the brown sugar. (If making the chocolate fudge add the cocoa at this point too.)
Bring to a boil stirring constantly.

Once boiling, let boil for 2 minutes without stirring.

Remove from heat after 2 minutes of boiling and add the peanut butter and the pure vanilla extract.
* The next couple of steps are fast and furious. *
In a large mixing bowl pour the boiling hot mixture on top of the powdered sugar and vigorously mix together by hand until smooth. (This needs to be done fast as possible, for the fudge will set up quickly once the powdered sugar is mixed thoroughly in.)
Pour into your prepared pre-buttered containers. I use those Glad and Ziploc plastic sandwich tubs.
Cool until fudge is set up. Turn container upside down over a cutting board to remove the fudge. Cut into desired size squares and serve.
Thursday, November 25, 2010
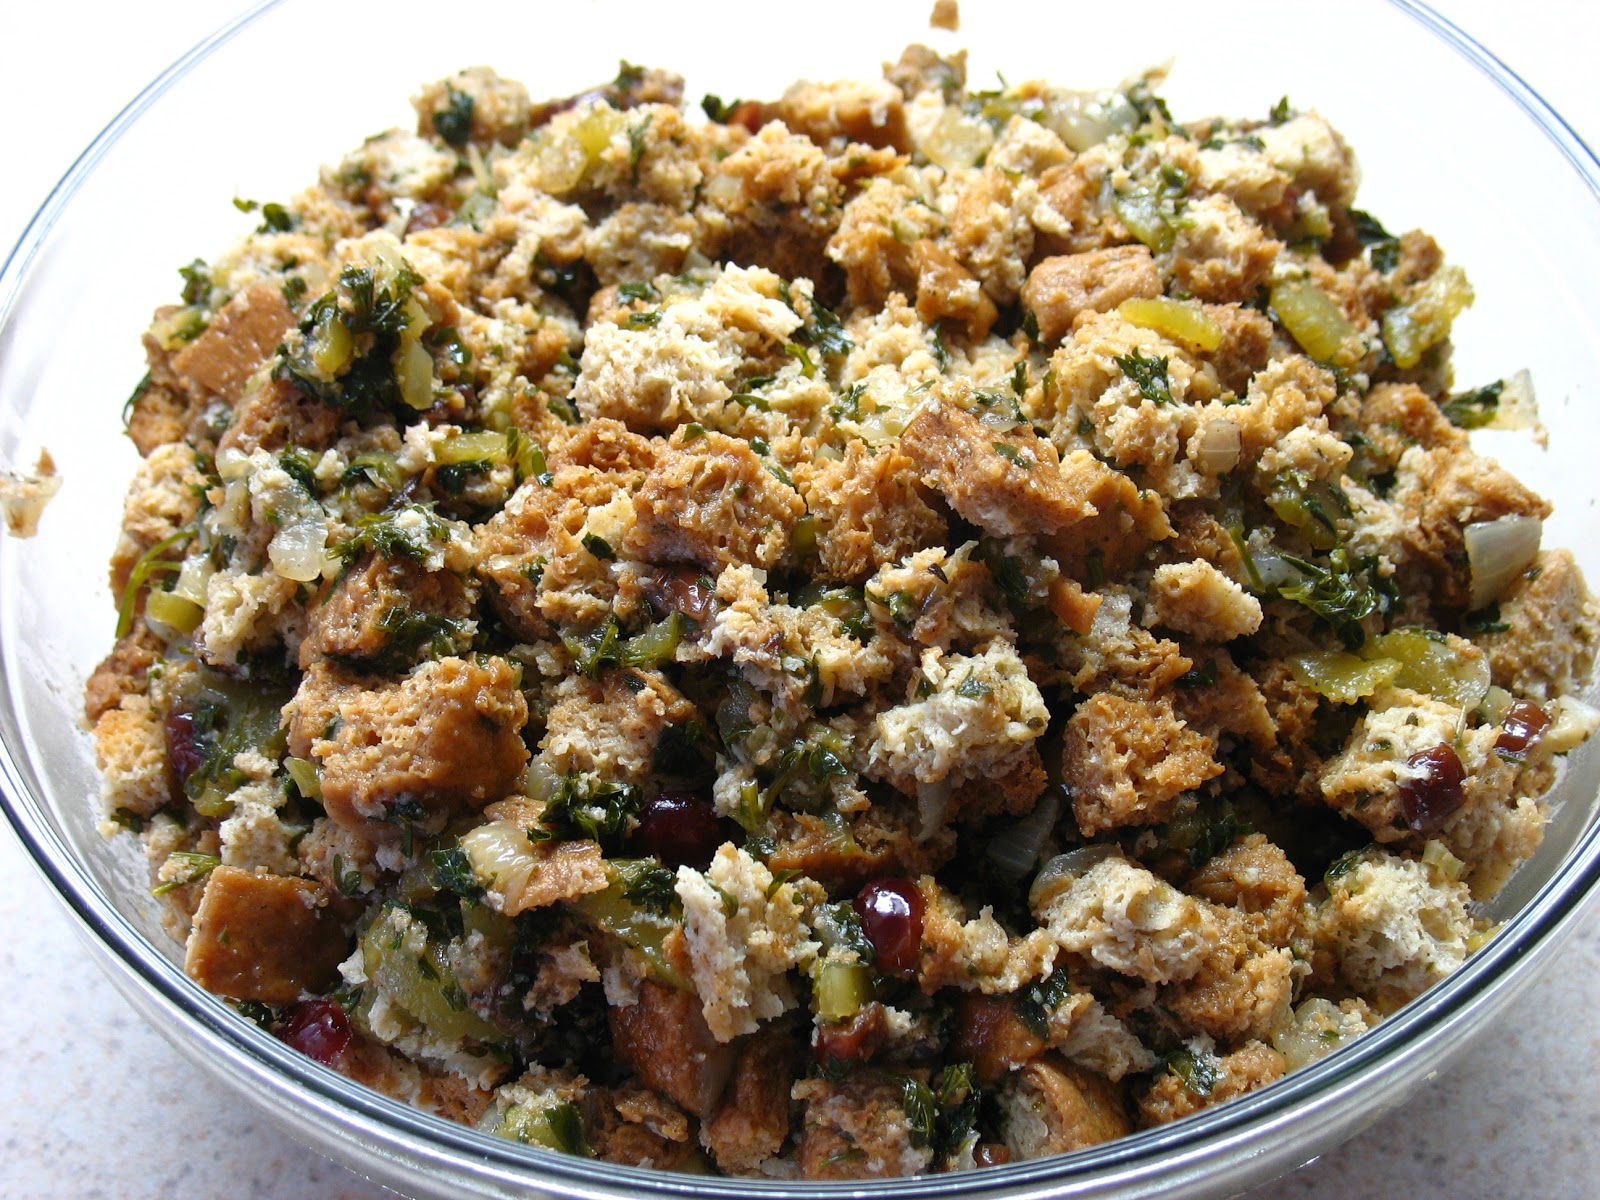
Gluten Free Stove Top Stuffing

This year for a Thanksgiving treat I made my gluten free version of Stove Top Stuffing. This was very easy to make and really delicious. I suppose you can use any gluten free sandwich bread but I made my own Sandwich Bread a couple days early.
I broke up the bread and toasted it, then put it in the freezer in plastic tubs.

You could also use a loaf of Udi's Gluten Free whole grain bread cut into cubes and toasted, I found it easiest to cut two slices at a time.


- 1 bunch fresh parsley
- 1 cup finely sliced celery
- 1 cup finely diced onion
- 1 stick unsalted sweet cream butter
- 1 teaspoon ground marjoram
- 1 teaspoon ground sage
- 1 teaspoon ground black pepper
- 1 teaspoon italian seasoning
- 1 teaspoon garlic salt
- 1/2 teaspoon celery salt
- 1 teaspoon minced garlic
- 1 can Swanson chicken stock
- 4 cups gluten free bread crumbs
Begin by preparing the onion, celery, and parsley.

Next, melt the butter in a large saucepan with the spices. After the melted butter and spices are mixed together, add the bowl of celery, onion, and parsley. Add the garlic. Stir well and cook until celery, garlic, and onions are softened.

Add in the chicken stock and bring to a boil. Once boiling, remove from heat and stir in the gluten free bread crumbs until mixed well. Cover and set aside for 5 minutes. Uncover and fluff with a fork.
Here it is made with an addition of re-hydrated cranberries and using a loaf Udi's Whole grain bread.
Serve, and Enjoy!
Gluten Free Blueberry Pear Pie

This wasn't the prettiest crust that I've made, but it was absolutely delicious. I was going to bake this pie using my Puff Pastry recipe, but with Thanksgiving dinner taking up most of my time, I tried to speed it up a bit with delicious results.
I used the ingredients for my Puff pastry, but not the directions. I went for more of a "rough puff pastry".
It puffed, and that's an important factor. It was buttery and delicious, that's also an important factor. It was made in 1/8th the time, that was the most important factor for me today.
Ingredients
Filling
4 Bartlett Pears (peeled, cored, and diced)
2 packages of Blueberries (4.4 ounce each)
1/2 cup Arrowroot Starch Flour
1 cup Sugar
The Crust
1/2 cup Millet Flour
1/2 cup Sweet Rice Flour
1/2 cup Arrowroot Starch Flour
1/2 cup Sweet White Sorghum Flour
2 teaspoons Xanthan Gum
2 tablespoons Clover Honey
1/4 teaspoon ground Sea Salt
3/4 cup ice cold water
1 and 1/2 stick of Unsalted Butter (12 tablespoons/ diced)
1 teaspoon Pure Vanilla Extract
Begin by mixing all the dry ingredients together thoroughly. Then in your stand mixer, add the remaining ingredients for the crust and mix well with the dough hook attachments. The butter will not incorporate completely, this is expected. The dough should look almost like sticky mashed potatoes with visible butter chunks remaining.
Turn the dough out onto a heavily floured pastry rolling mat. (use sweet rice flour)

Sprinkle flour on top, and roll out with a cold glass or marble pastry rolling pin. Here, I kept rolling into a block and doing the turns as if i was making puff pastry, adding flour to the mat as necessary to prevent sticking. I did all 6 turns at this point, letting the dough get softer and warmer than you would for puff pastry.

After the 6th turn, I wrapped the dough in cling-wrap and refrigerated for about 2 hours. I took it out of the refrigerator and cut it into 2 equal pieces.
Roll one half into a circle and place into the pie tin, trimming off the edges. Roll the other half into a rectangle and using a pizza roller, cut the dough into 1 inch strips. I wrapped the strips in cling-wrap and then placed the pie crust and the strips into the refrigerator while I prepared the filling and pre-heated the oven to 350 degrees.
Wash, core, peel and dice your pears.

Wash the blueberries and add them, the sugar, and the Arrowroot to the pears. Mix well.

Now add the filling to the chilled pie crust.

Now, I made a weave on top of the pie with the strips and a thin layer around the edge. I used an egg yolk wash to glue the strips and the border on. I painted the outer edge with the egg yolk for a browner crust (next time I won't do that).
Bake 350 degrees for 45 minutes.
The pastry puffed and browned a golden brown all on its own. It was soft and buttery too.

Enjoy!
Monday, November 22, 2010
Guest Blogging for Bob's Red Mill
Today I finished not only creating a new recipe, which always gets my juices flowing. I finished writing my first guest blog for Bob's Red Mill. You all know that I use, almost exclusively, Bob's Red Mill products. We love his standard of gluten-free milling.
Anyhow, here is a link to the blog and My Gluten Free Cinnamon Roll recipe.
http://www.bobsredmill.com/blog/2010/11/22/guest-post-gluten-free-cinnamon-rolls-from-the-gluten-free-spouse/
 Enjoy!
Anyhow, here is a link to the blog and My Gluten Free Cinnamon Roll recipe.
http://www.bobsredmill.com/blog/2010/11/22/guest-post-gluten-free-cinnamon-rolls-from-the-gluten-free-spouse/
Friday, November 12, 2010
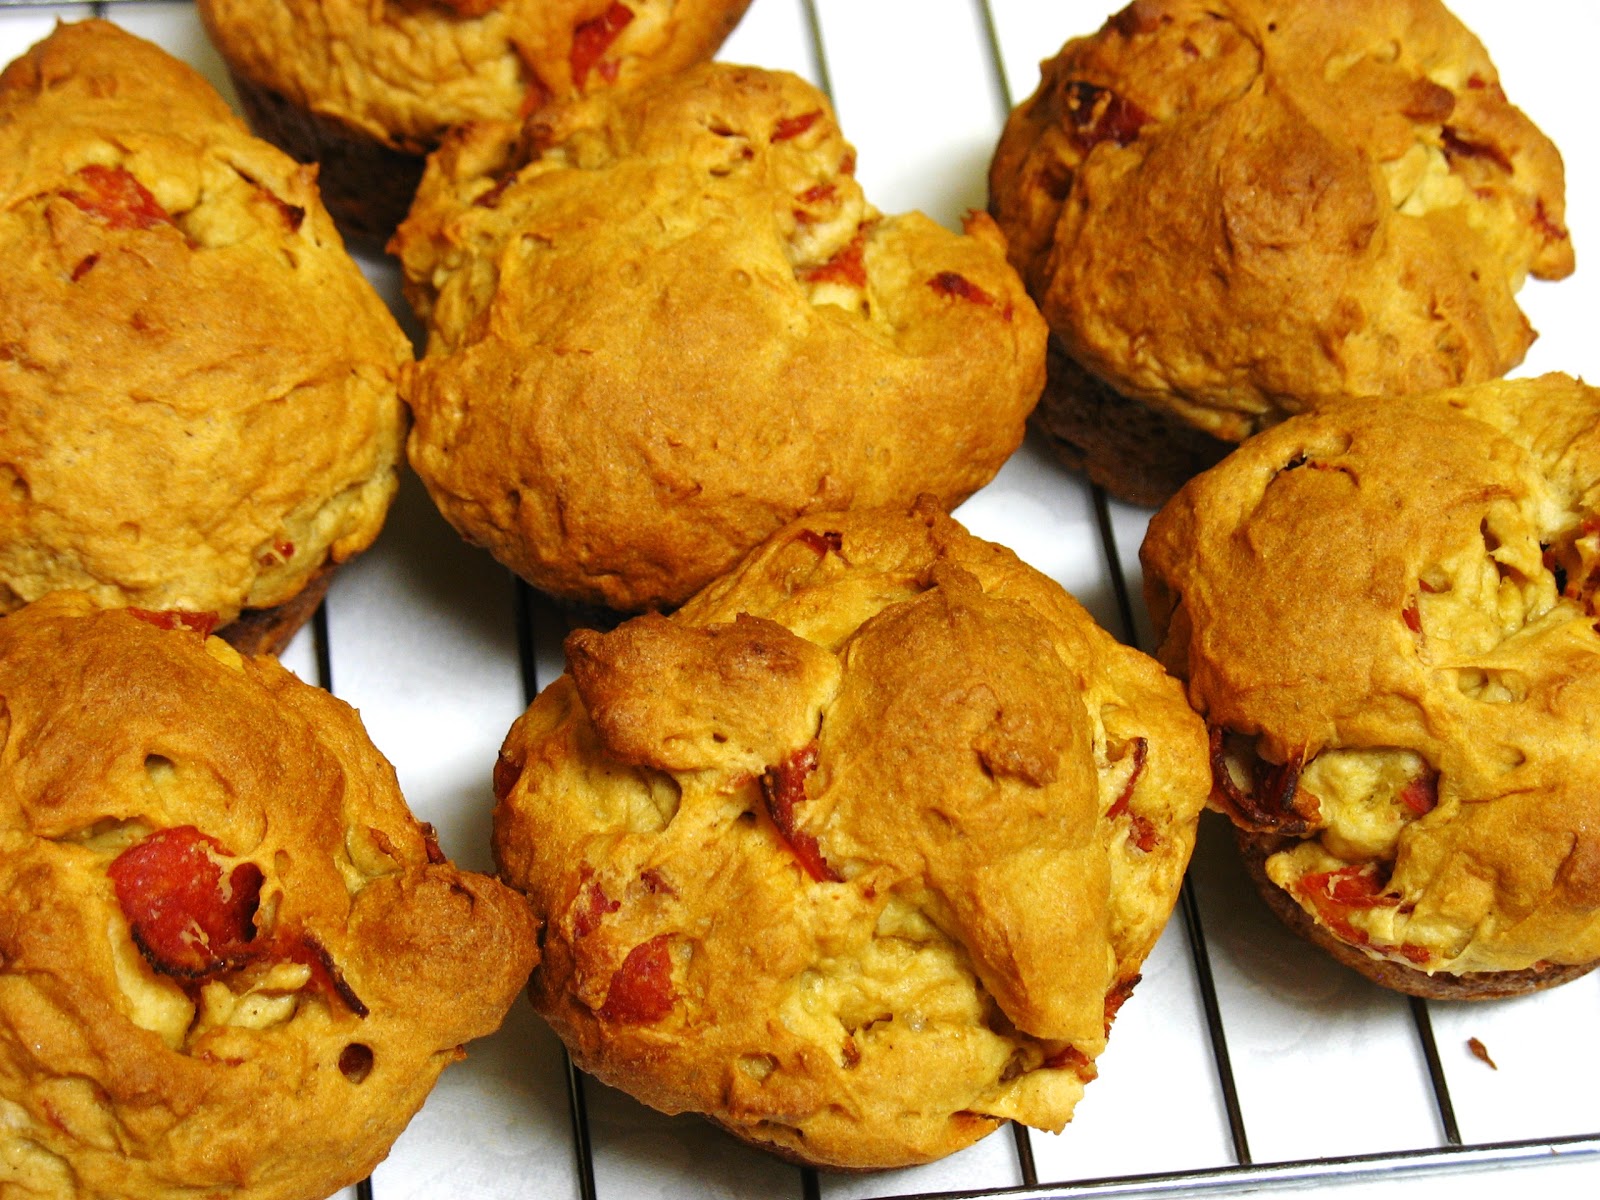
Gluten Free Pepperoni Rolls

Finally! Gluten Free pepperoni rolls! Not just any gluten free pepperoni roll, ohhhh no! These are the elusive West Virginia pepperoni roll. This recipe has eluded me in both taste and texture for oh so very long. But, ever since my new sandwich bread breakthrough, nothing seems out of my culinary reach.
The West Virginia pepperoni roll is found in every gas station, convenience mart, grocery store, and a few bait and tackle shops in the great state of West Virginia. They can be found at some bordering states close by, but nowhere else in the United States. People just stare at you funny when you ask for one. (I'd like to note that they are just called "pepperoni rolls" not "West Virginia pepperoni rolls". I just said that to clarify.)
I chose to make mine in a muffin tin, generally they are made in an elongated roll.
Ingredients:
3 large eggs
1 package of Hormel Pepperoni (gluten free) 8 ounces
Group 1
1 cup potato starch
3/4 cup quinoa flour
1/2 cup arrowroot
3/4 cup sweet white sorghum flour
3/4 cup sugar
3/4 teaspoon of salt
2 1/2 teaspoons of Xanthan Gum
1 teaspoon baking soda
1 teaspoon baking powder
Group 2
1/4 cup warm water
2 teaspoons of active dry yeast (1 packet, 8.75 grams)
1 teaspoon sugar
Group 3
3/4 cup whole milk
1 tablespoon apple cider vinegar
Begin by setting all ingredients out to come to room temperature. Do not use anything cold with yeast.
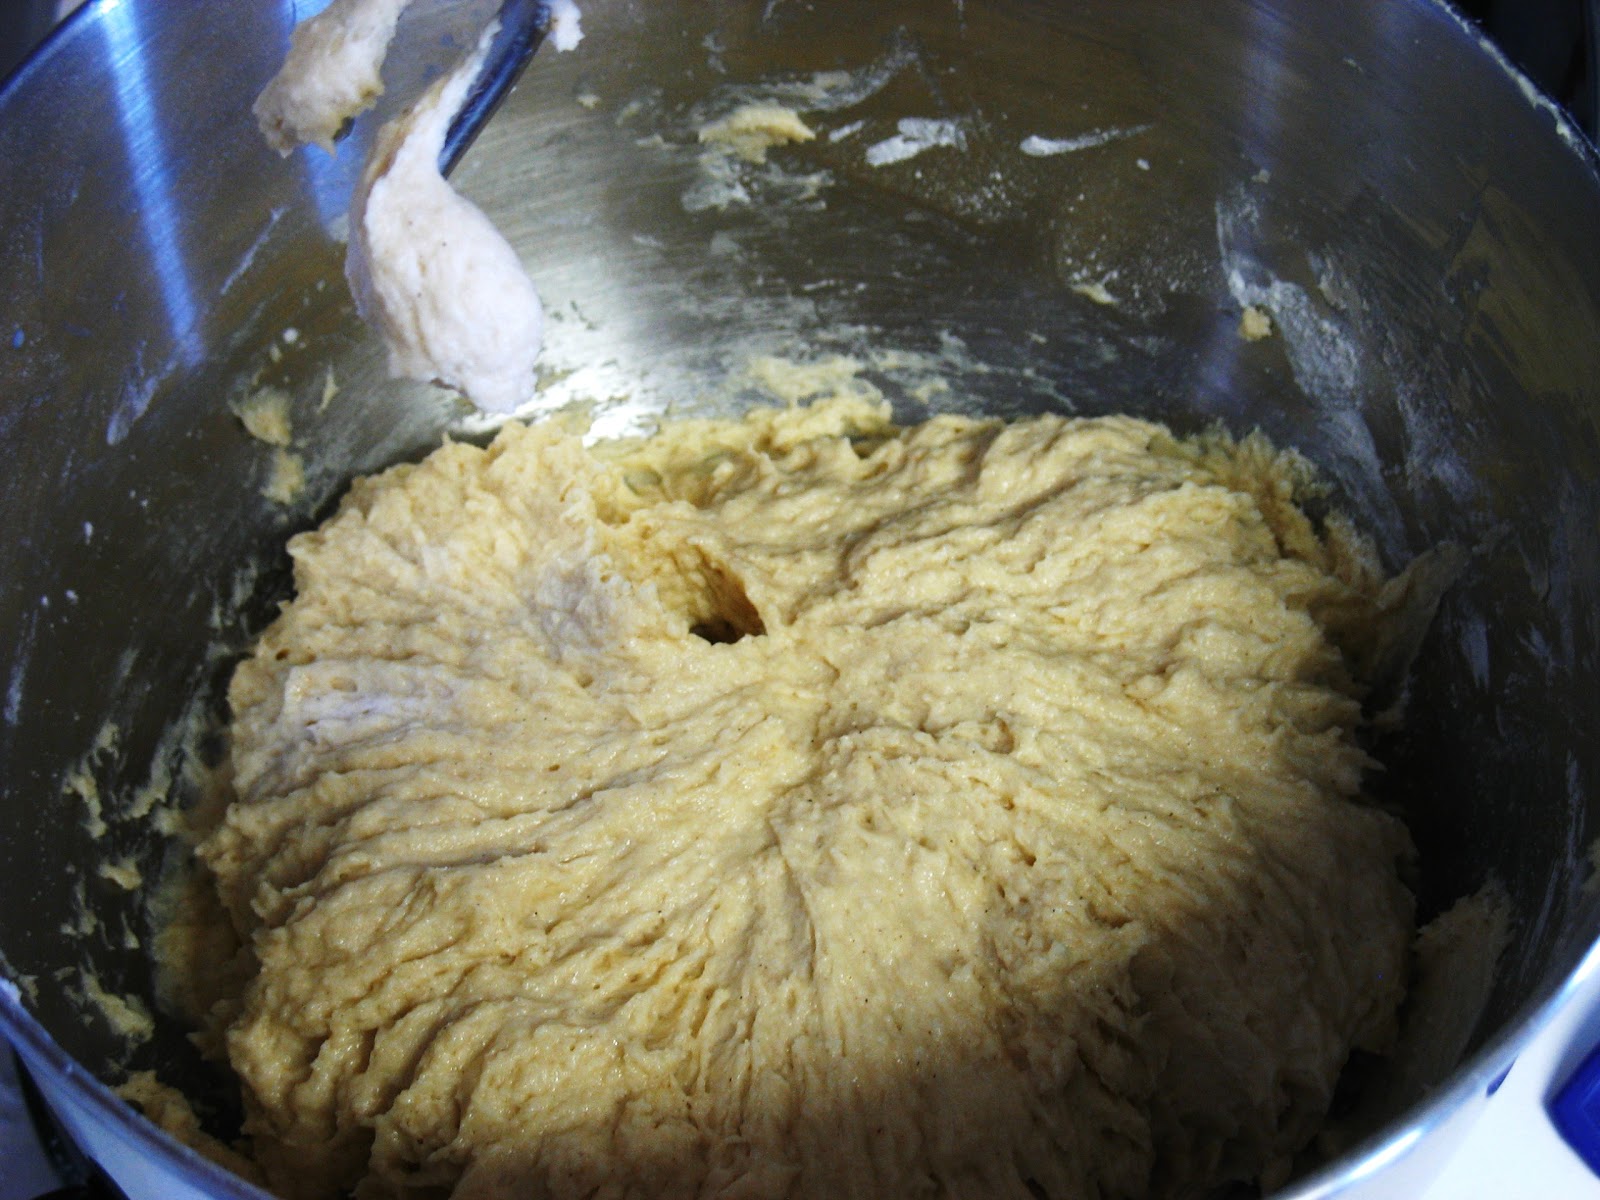
Mix all the dry ingredients from group 1 together with a whisk in your stand mixer bowl. Make sure to be thorough.

With dough hooks attached, mix the wet ingredients into the dry ingredients using your stand mixer.
At this point I cut up the pepperoni and stir it into the dough mixture by hand.
Spray your large muffin tin with a nonstick cooking spray. I used Crisco 100% extra virgin olive oil spray.

Spoon all the dough into the muffin tin evenly distributing it. Place into the 175 degree oven to rise for 45 minutes. Turn the oven up to 350 degrees and bake for 30 to 35 minutes or until golden brown and springs back when touched.
Cool on a wire rack.
Here are a few pictures of the inside.
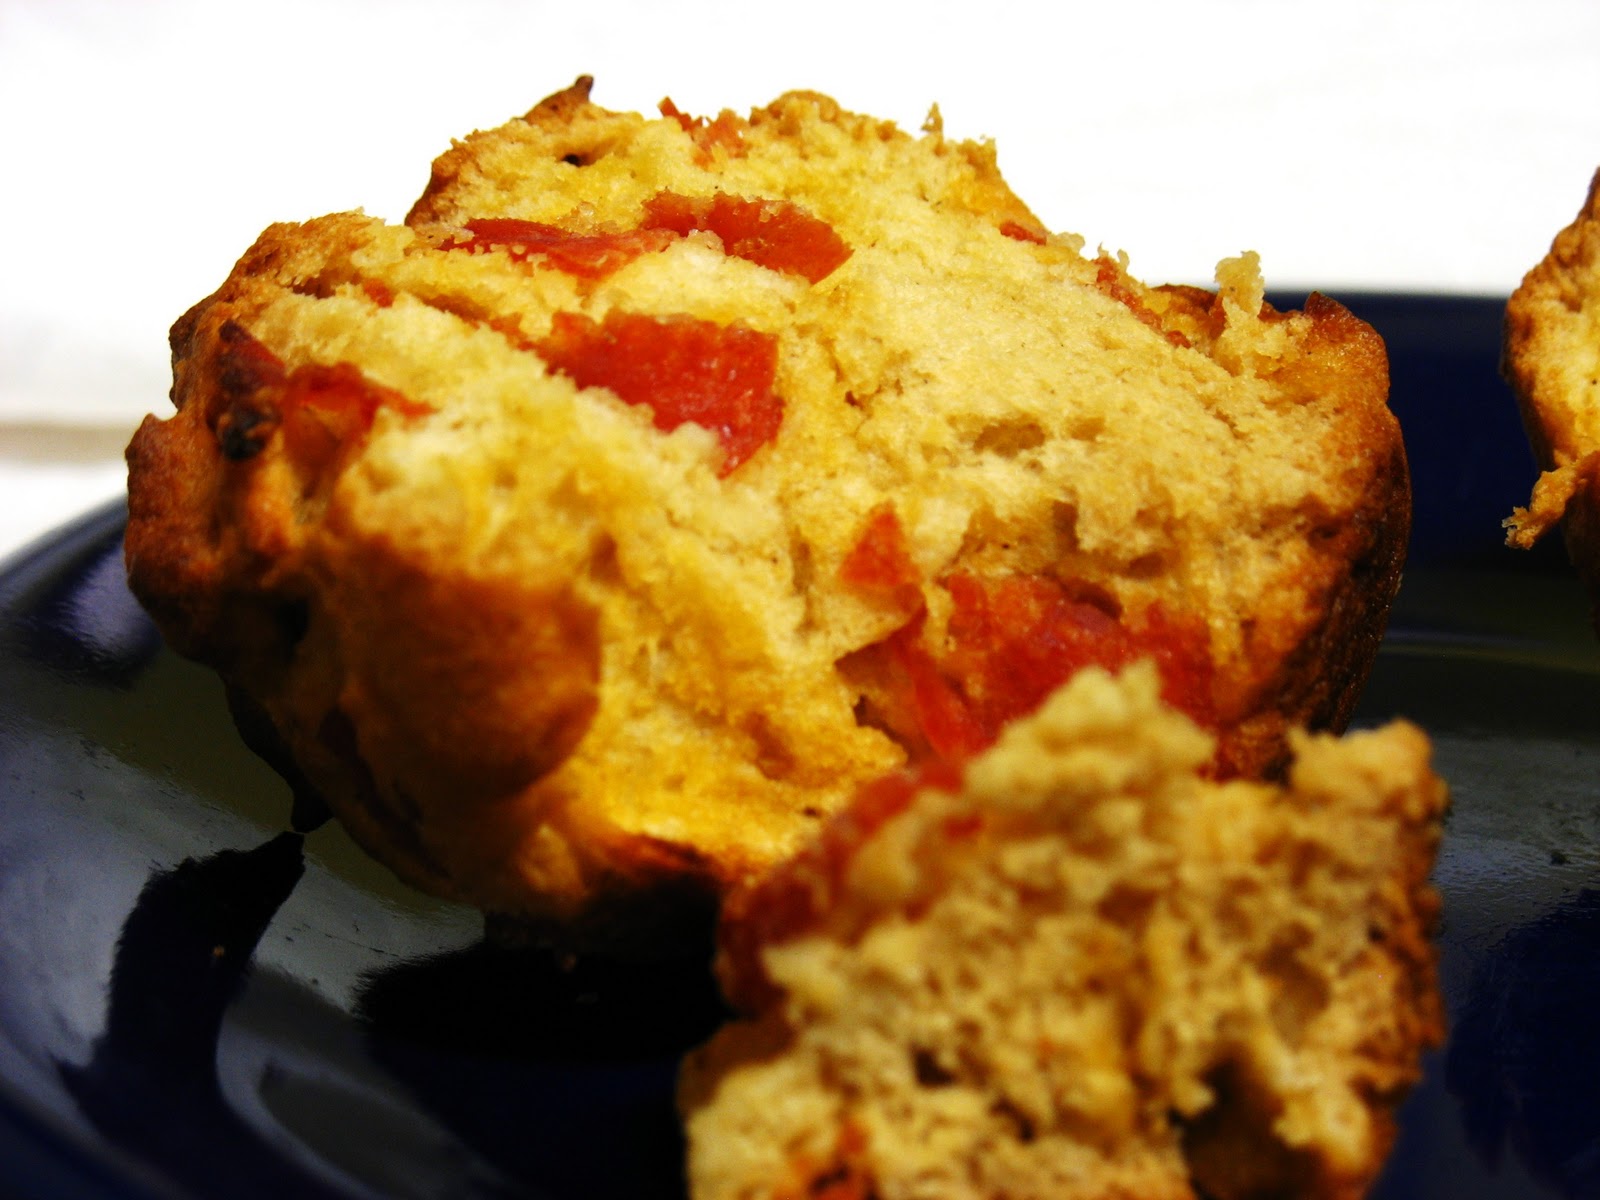
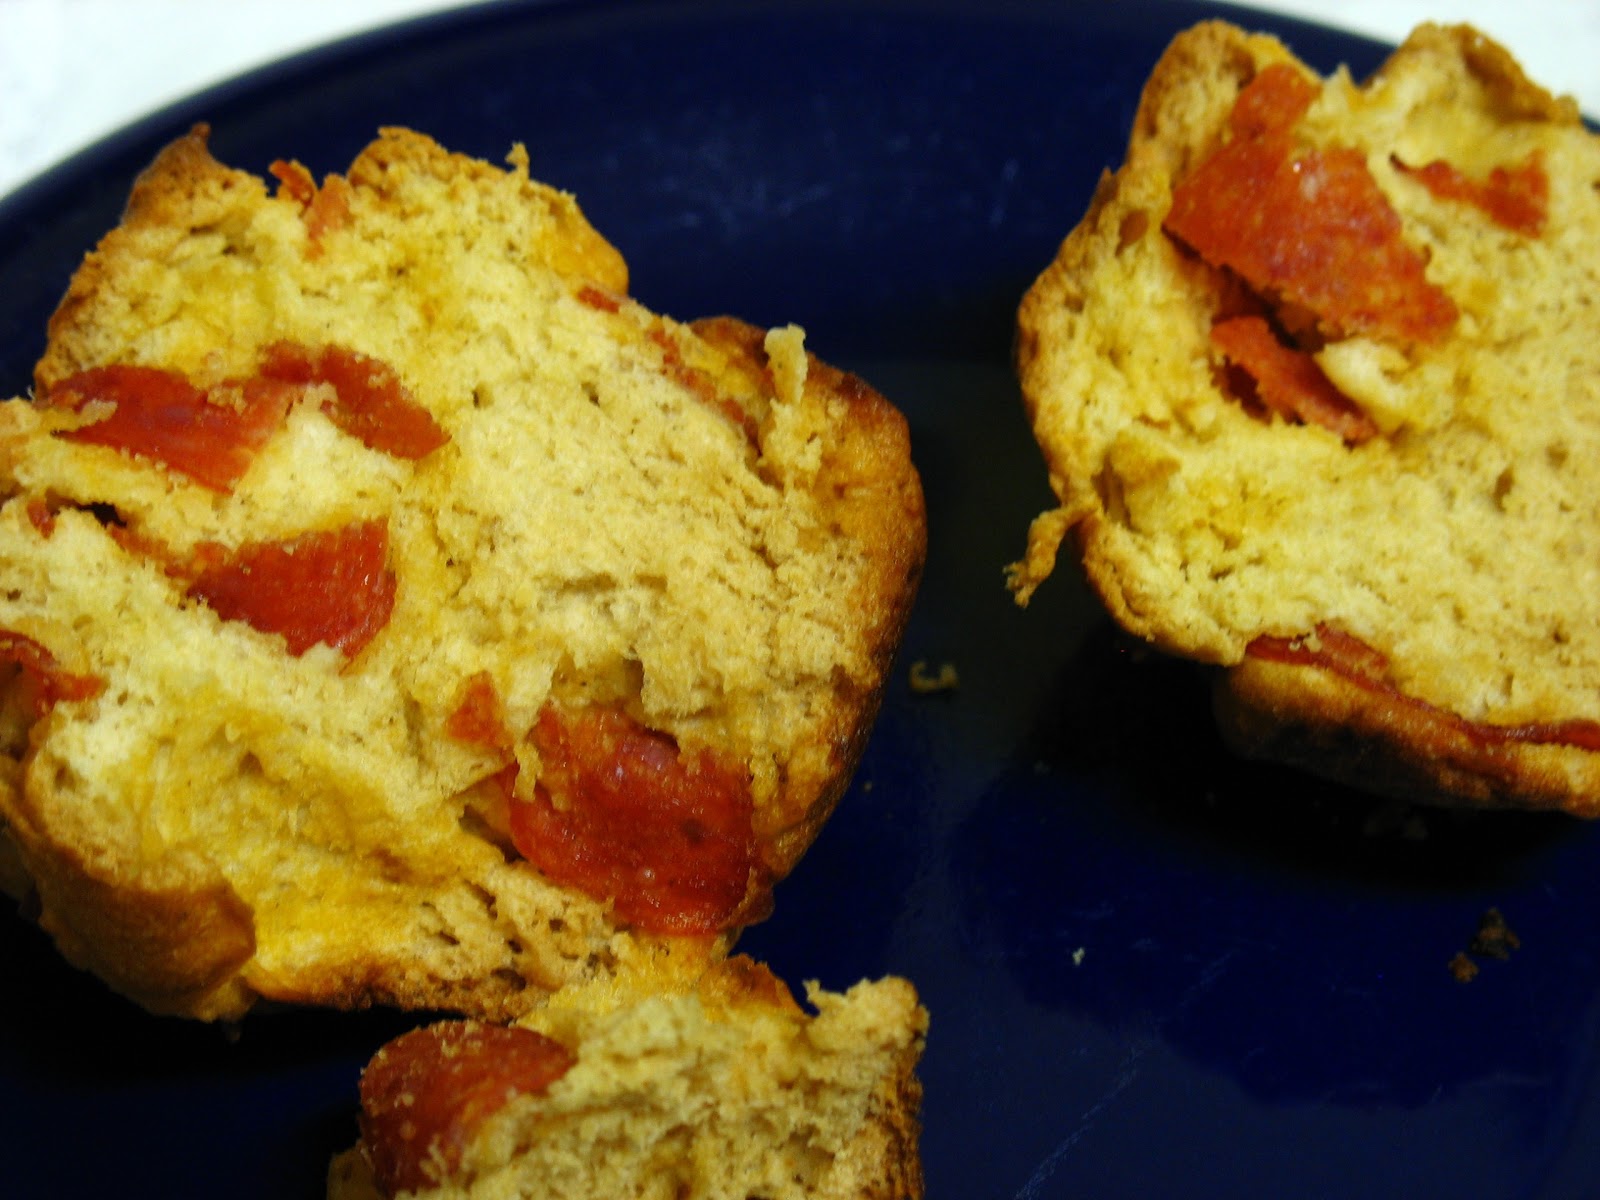
These are just as soft and light and springy as the sandwich bread. Stir in some mozzarella cheese for variety.
Enjoy!
Monday, November 8, 2010
Gluten Free Pear Apple Cobbler - Glass Bowl Method

This was the easiest recipe I think i have ever made up. A cobbler is a wonderful treat for your family as well as yourself. Delicious anytime, but best served warm with some ice cream. yummmy!!
I chose to make this as simple as I could, and I am very thankful for the Anchor Hocking Glass bowl set
Ingredients
2 ripe pears (peeled, cored, diced)
2 ripe apples (peeled, cored, diced)
1 stick of unsalted butter
1/3 cup white sugar
1/3 cup brown sugar
1/2 teaspoon cinnamon
1/2 teaspoon nutmeg
1/2 teaspoon xanthan
1/2 teaspoon baking soda
1/2 teaspoon baking powder
2 eggs
1 teaspoon pure vanilla extract
1/4 teaspoon salt
1/3 cup potato starch
1/3 cup sweet white sorghum flour
1/3 cup sweet rice flour
1/2 cup whole milk
Begin by placing the stick of butter into the largest glass oven ready bowl you have. Place this in the oven and begin preheating oven to 350 degrees.

You want the butter melted, not cooked, so remove when melted.

In a separate bowl, mix together the flours, xanthan, baking soda, baking powder, egg, salt, vanilla, and milk.
Pour this batter directly into the melted butter. Loosely stir together, not really trying to mix the batter and the butter. Too much mixing can ruin the end product.

Next, peel, core, and dice the apples and the pears into a bowl.

Mix in the sugars and the spices and set aside until needed.

Add the fruit on top of the mixture in the bowl. Once again take care to just barely stir together. Chunky and funky is the goal.

Place the bowl in the 350 degree oven and bake for approximately 45 minutes to an hour. It will almost double in size, and the house will smell divine.

A few shots of the finished cobbler.
A very delicious and very simple way to make a traditional dessert.
Enjoy!!!
Subscribe to:
Posts (Atom)